Somewhere around chapter twelve, a novel stops fitting in your head. You know what happens next, but not what it does to the thing you set up in chapter three. That is the moment for a board: a table where every chapter lies face up and you can finally see the shape of the book.
The board in Writ10 was redrawn for version 1.0.1. This is a tour of everything it does, and three ways to use it.
The board is your book, not a copy of it
Open a story and choose Board in the header, or press ⌘3. There is nothing to fill in: the cards are your chapters. Each one shows its number, its title, its opening line, its word count and how many notes it has. Rename a chapter in the manuscript and its card changes with it. Double-click a card and you are back in that chapter, on the page.
One rule keeps the board a safe place to think: moving cards never changes your manuscript. The order of the chapters is decided in the chapter list. The board is for seeing.
Starting: two buttons, or one card at a time
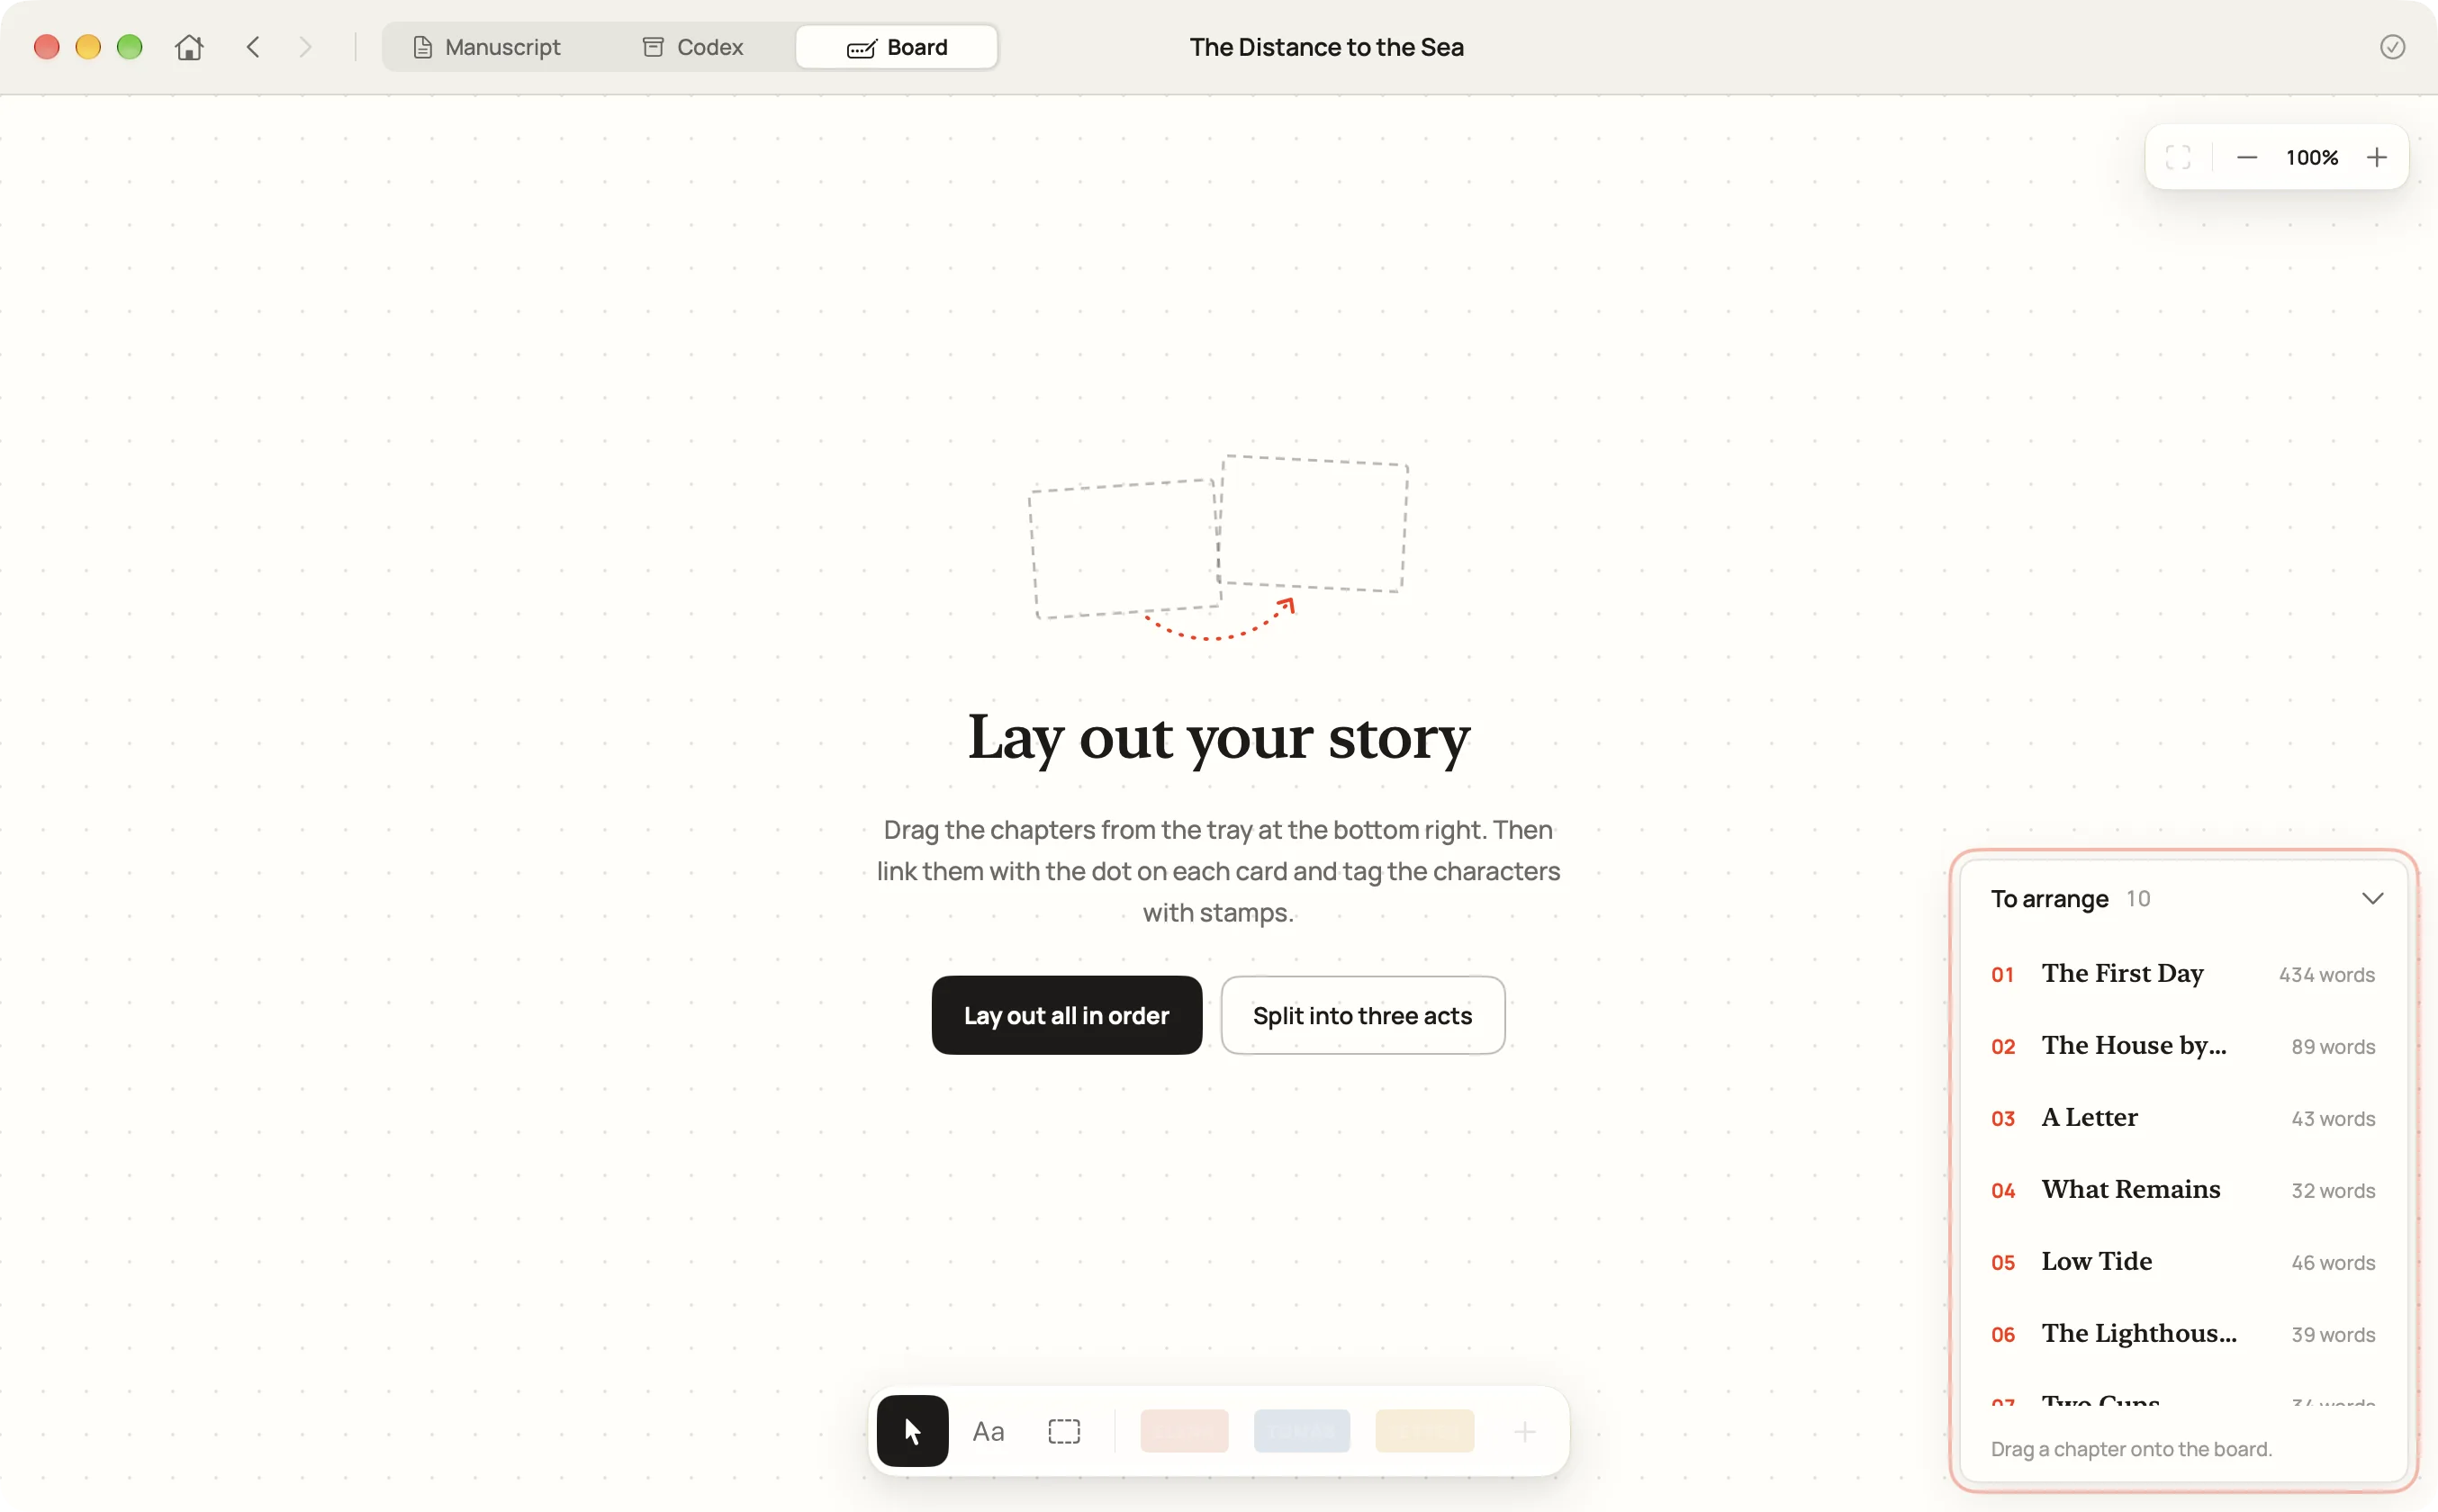
The first time, the board is empty and your chapters wait in the To arrange tray at the bottom right. From here you can:
- Lay out all in order. Every chapter goes onto the board in story order, in rows of four.
- Split into three acts. Three empty acts appear side by side, ready to be filled.
- Drag chapters out of the tray one by one and put each where it belongs. Drop a card back on the tray to take it off the board.
Cards: a colour, and where you are
Click the dot at a card’s top left corner to give it one of six colours. Use them for whatever your book needs: a point of view, a timeline, how finished a chapter is. The chapter you have open in the manuscript is marked Open in red, so you always know where you were writing.
Arrows that say why
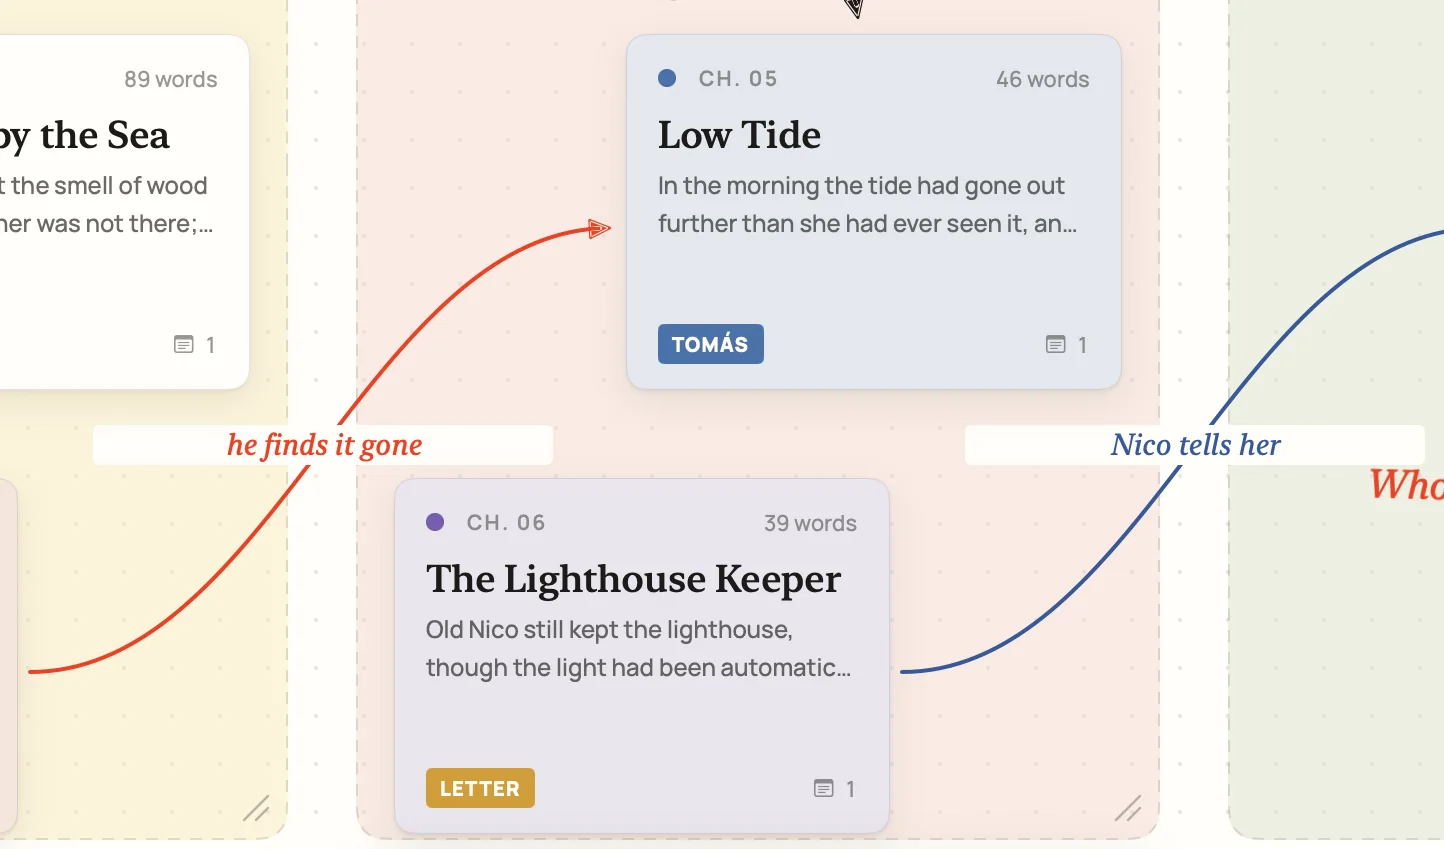
Hover a card and a small handle appears at its top right corner. Drag it to another card and an arrow links the two; it follows them wherever they move. Right-click an arrow to choose its ink (ink, red, blue or green), to remove it, or to write on the arrow: a few words along the line, such as “he finds it gone”.
A plot is cause and effect. The arrow is the effect; the words on it are where you write the cause.
Acts: zones you can name and move
Press A and drag on the empty board to draw an act, or click to place one. Give it a name (“Act I”, “The island”, “1943”) and a tint. Drag an act by its name and the cards inside it travel along; drag its corner to resize it. Acts group by eye only: a card is in an act simply because it sits there.
Words in marker
Press T, click the board, and write a few words straight onto it: a question you haven’t answered yet, a theme, a date. They are set in italic in the marker’s ink, and you can drag them anywhere.
Stamps for characters and threads

A stamp is a word you tag cards with: a character’s name, a subplot, “flashback”. Press + in the dock, type the word, then click the cards that should carry it; click again to take it off. Save a stamp and it stays in the dock, in the colour you choose.
At a glance you can see that a character disappears for six chapters, or that the letter is mentioned only once before it matters.
Getting around
The board pans and zooms like a map: scroll, or drag the empty board, to move; pinch to zoom. The controls at the top right fit every chapter in view. When you leave for the manuscript and come back (⌘[ takes you back) the board is exactly as you left it.
- Board⌘3
- Manuscript⌘1
- MoveV
- TextT
- ActA
- Put the tool downEsc
Three ways to use it
1. Check the shape
Split the board into three acts and drop your chapters in. If the second act holds fourteen cards and the third holds two, you have learned something no word count would tell you.
2. Follow one thread
Make a stamp for a character or an object and tag every chapter where it matters. Then read only those cards, in order. Gaps and repetitions show at once.
3. Plan before you write
A chapter doesn’t need any text to be on the board. Create ten empty chapters, name them for what happens in each, and arrange them. When the plan holds, double-click the first card and start writing.
Not a board person? Some novelists never outline, and that is a method too. Settings ▸ General lets you hide the Board tab. Whatever is on it stays in your story, in case you change your mind.
The board is part of Writ10, the novel-writing app for Mac. If you already have Writ10, update to version 1.0.1 from the Mac App Store and open your story: your chapters are there, on the board or waiting in the tray.